
绘制线
Draw Line
你将学到什么
- pickPosition 取地表/模型精确三维点
- 左键加点、Entity.polyline 逐段连线
- clampToGround 贴地线与 mousemove 橡皮筋预览
- Cartesian3.distance 累计距离标签
效果说明
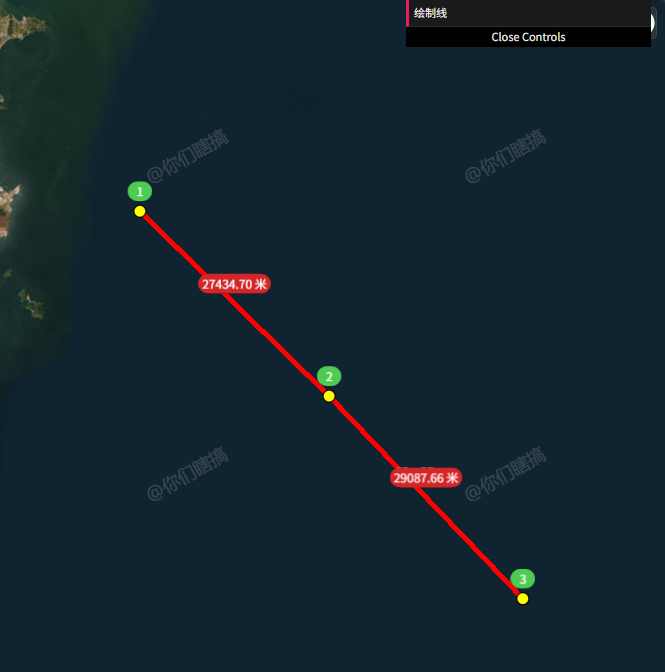
GUI 点「绘制线」进入模式:左键落点、绿底序号 billboard 标记顶点,段与段之间红色贴地线;鼠标移动显示虚线预览与实时总长。
核心概念
pickPosition vs globe.pick
js
const cartesian = viewer.scene.pickPosition(movement.position);需开启 depth buffer(有地形/3D Tiles 时);比 camera.pickEllipsoid 更贴表面。
绘制状态机
initLineDrawing → LEFT_CLICK 加点
              → MOUSE_MOVE 更新 tempLineEntity(CallbackProperty)
              → RIGHT_CLICK / 双击 结束
clearLineEntities → destroy handler
CONFIG 集中样式
点、线、临时线、label 颜色宽度统一在 CONFIG 对象,便于 GUI 扩展。
实现步骤
- CONFIG 定义 point / line / tempLine / label 样式
- GUI「绘制线」→
clearLineEntities→initLineDrawing - 每次点击 push 坐标、add 点 Entity、≥2 点时 add polyline Entity
- mousemove 用
CallbackProperty更新预览线终点 - 距离 label 跟随鼠标或最后一点
代码要点
js
const lineEntity = viewer.entities.add({
    polyline: {
        positions: [prev, curr],
        width: CONFIG.line.width,
        material: CONFIG.line.material,
        clampToGround: CONFIG.line.clampToGround,
    },
});

// 预览线
tempLineEntity = viewer.entities.add({
    polyline: {
        positions: new Cesium.CallbackProperty(() => {
            return [lastPoint, currentMousePoint];
        }, false),
        width: CONFIG.tempLine.width,
        material: CONFIG.tempLine.material,
        clampToGround: true,
    },
});
事件规范
重新进入绘制前 destroy 旧 ScreenSpaceEventHandler,避免重复注册。
源码
完整源码见 GitHub。
小结
基础功能 · Cesium.js · 16/19