模型阴影
Model Shadow
你将学到什么
- Three.js 实时阴影 的四步开启清单
castShadow与receiveShadow的分工- ShadowMap 类型(Basic / PCF / PCFSoft / VSM)的区别
- 用 lil-gui 动态开关阴影调试
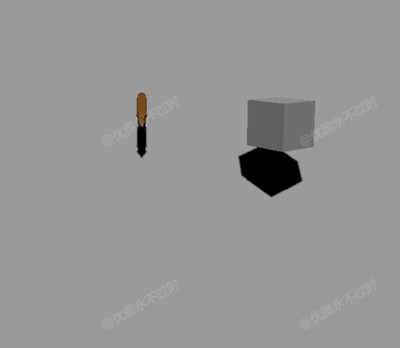
效果说明
白色地面(Plane)上,狐狸 glTF 模型 与 旋转立方体 投射实时阴影。GUI 面板可切换:
- 阴影总开关
shadowMap.enabled - 阴影算法类型
- 地面是否接收阴影、立方体/光源是否投射阴影
核心概念
阴影渲染管线
Three.js 阴影基于 Shadow Mapping(阴影贴图):光源视角渲染一张深度图,主相机渲染时比较像素深度决定是否落在阴影中。
开启阴影的四步清单:

1. renderer.shadowMap.enabled = true
2. light.castShadow = true          ← 至少一个光源
3. mesh.castShadow = true           ← 投射阴影的物体
4. mesh.receiveShadow = true        ← 接收阴影的地面/墙面
缺任何一步,阴影都不会出现。
castShadow vs receiveShadow
| 属性 | 作用 | 本案例 |
|---|---|---|
castShadow | 该 Mesh 遮挡光线,产生阴影 | Fox 模型、立方体 |
receiveShadow | 该 Mesh 表面显示 others 的阴影 | 白色 Plane 地面 |
同一物体可以 既 cast 又 receive(如地面上的盒子投阴影到地面,同时接收狐狸的阴影)。
材质要求
只有 受光材质 才能正确显示阴影:
- ✅
MeshStandardMaterial、MeshPhongMaterial、MeshLambertMaterial - ❌
MeshBasicMaterial— 不受光照,不显示阴影
本案例地面和立方体均用 MeshStandardMaterial。
ShadowMap 类型
js
renderer.shadowMap.type = THREE.PCFSoftShadowMap; // 默认推荐| 类型 | 特点 |
|---|---|
BasicShadowMap | 硬边,锯齿明显,最快 |
PCFShadowMap | 百分比邻近滤波,边缘稍软 |
PCFSoftShadowMap | 更柔和,大多数项目默认 |
VSMShadowMap | 方差阴影贴图,适合大面积软阴影,偶有漏光 |
切换类型后需触发 material.needsUpdate = true(本案例 GUI 的 onChange 已处理)。
DirectionalLight 阴影
本案例用 平行光(变量名虽叫 pointLight)从上方 (0, 400, 0) 照射,类似太阳:
js
const light = new THREE.DirectionalLight(0xffffff, 1);
light.position.set(0, 400, 0);
light.castShadow = true;
平行光阴影由 正交相机(light.shadow.camera)定义范围,大场景需调整 left/right/top/bottom/near/far 避免阴影裁切或分辨率浪费。
实现步骤
- Renderer 开启
shadowMap.enabled - 创建 DirectionalLight 并
castShadow = true - Plane 地面
receiveShadow = true,旋转至水平 - 加载 Fox.glb,
traverse设置子 MeshcastShadow = true - 立方体
castShadow = true,加入旋转动画 - GUI 绑定阴影开关与类型,便于对比
代码要点
模型遍历设阴影
js
model.traverse((child) => {
    if (child.isMesh) child.castShadow = true;
});
glTF 模型是 Group 嵌套多个 Mesh,必须 traverse 逐个设置。
接收阴影的地面
js
const plane = new THREE.Mesh(
    new THREE.PlaneGeometry(100, 100),
    new THREE.MeshStandardMaterial({ color: 0xffffff })
);
plane.rotation.x = -Math.PI / 2;  // 躺平到 XZ 平面
plane.position.y -= 0.5;
plane.receiveShadow = true;
GUI 切换阴影类型
js
folder.add(renderer.shadowMap, 'type', {
    Basic: THREE.BasicShadowMap,
    PCF: THREE.PCFShadowMap,
    PCFSoft: THREE.PCFSoftShadowMap,
    VSM: THREE.VSMShadowMap
}).onChange(() => {
    scene.traverse(obj => {
        if (obj.material) obj.material.needsUpdate = true;
    });
});
性能
阴影贴图每光源额外一次渲染 pass。移动端建议限制 castShadow 物体数量,并降低 light.shadow.mapSize(默认 512,可设 1024/2048 提升清晰度)。
源码
js
import * as THREE from 'three'
import { OrbitControls } from 'three/examples/jsm/controls/OrbitControls.js'
import { GLTFLoader } from "three/addons/loaders/GLTFLoader.js"
import { GUI } from "three/addons/libs/lil-gui.module.min.js";

const box = document.getElementById('box')

const scene = new THREE.Scene()

const camera = new THREE.PerspectiveCamera(50, box.clientWidth / box.clientHeight, 0.1, 1000)
camera.position.set(0, 10, 10)

const renderer = new THREE.WebGLRenderer({})
renderer.setSize(box.clientWidth, box.clientHeight)
renderer.shadowMap.needsUpdate = true
renderer.shadowMap.enabled = true
box.appendChild(renderer.domElement)

const controls = new OrbitControls(camera, renderer.domElement)
controls.enableDamping = true

window.onresize = () => {
  renderer.setSize(box.clientWidth, box.clientHeight)
  camera.aspect = box.clientWidth / box.clientHeight
  camera.updateProjectionMatrix()
}

new GLTFLoader().load(GLOBAL_CONFIG.getFileUrl('files/model/Fox.glb'), (gltf) => {
  const model = gltf.scene
  model.scale.set(0.01, 0.01, 0.01)
  model.traverse((child) => {
    if (child.isMesh) child.castShadow = true
  })
  scene.add(model)
})

const mesh = new THREE.Mesh(
  new THREE.BoxGeometry(1, 1, 1),
  new THREE.MeshStandardMaterial({ color: 0xffffff })
)
mesh.castShadow = true
mesh.position.set(3, 1, 1)
scene.add(mesh)

const pointLight = new THREE.DirectionalLight(0xffffff, 1)
pointLight.position.set(0, 400, 0)
pointLight.castShadow = true
scene.add(pointLight)

const plane = new THREE.Mesh(
  new THREE.PlaneGeometry(100, 100),
  new THREE.MeshStandardMaterial({ color: 0xffffff })
)
plane.position.y -= 0.5
plane.rotation.x = -Math.PI / 2
plane.receiveShadow = true
scene.add(plane)

const folder = new GUI()
const shadowMapList = {
  Basic: THREE.BasicShadowMap,
  PCF: THREE.PCFShadowMap,
  PCFSoft: THREE.PCFSoftShadowMap,
  VSM: THREE.VSMShadowMap
}
folder.add(renderer.shadowMap, 'enabled').name('shadowEnabled').onChange(() => {
  scene.traverse((object) => {
    if (object.material) object.material.needsUpdate = true;
  })
})
folder.add(renderer.shadowMap, 'type', shadowMapList).name('shadowType').onChange(() => {
  scene.traverse((object) => {
    if (object.material) object.material.needsUpdate = true;
  })
})
folder.add(plane, 'receiveShadow').name('planeShadow')
folder.add(mesh, 'castShadow').name('boxShadow')
folder.add(pointLight, 'castShadow').name('lightShadow')

animate()

function animate() {
  mesh.rotation.x += 0.01
  mesh.rotation.y += 0.01
  requestAnimationFrame(animate)
  controls.update()
  renderer.render(scene, camera)
}
小结
- 阴影 = Renderer 开关 + 光源 cast + 物体 cast + 地面 receive
- 默认用 PCFSoftShadowMap;调试时用 GUI 对比差异
- 阴影不显示?先查材质是否为 Basic、光源/物体 flag 是否遗漏
- 上一篇:模型加载 · 下一篇:天空盒
基础案例 · Three.js · 3/35